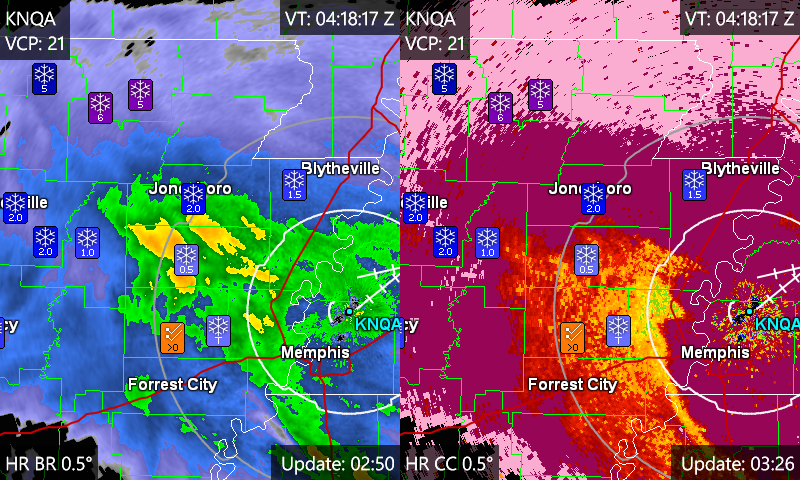
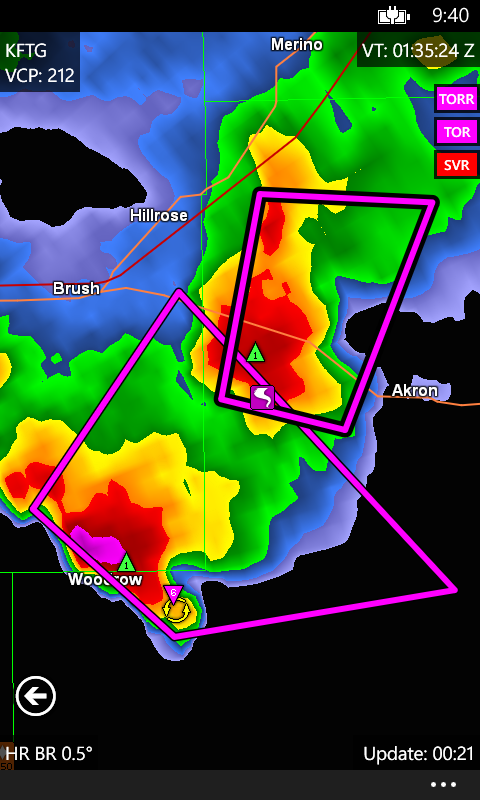
The MRLevel3 radar display contains up to two graphical radar product panels. Each panel has text information about the displayed product data in the four corners. Overlaid on the display are panels for the GPS Status (when enabled), Active Warning Types (when there are active warnings), and Step Forward/Backward buttons. Here's a annotated screencap:
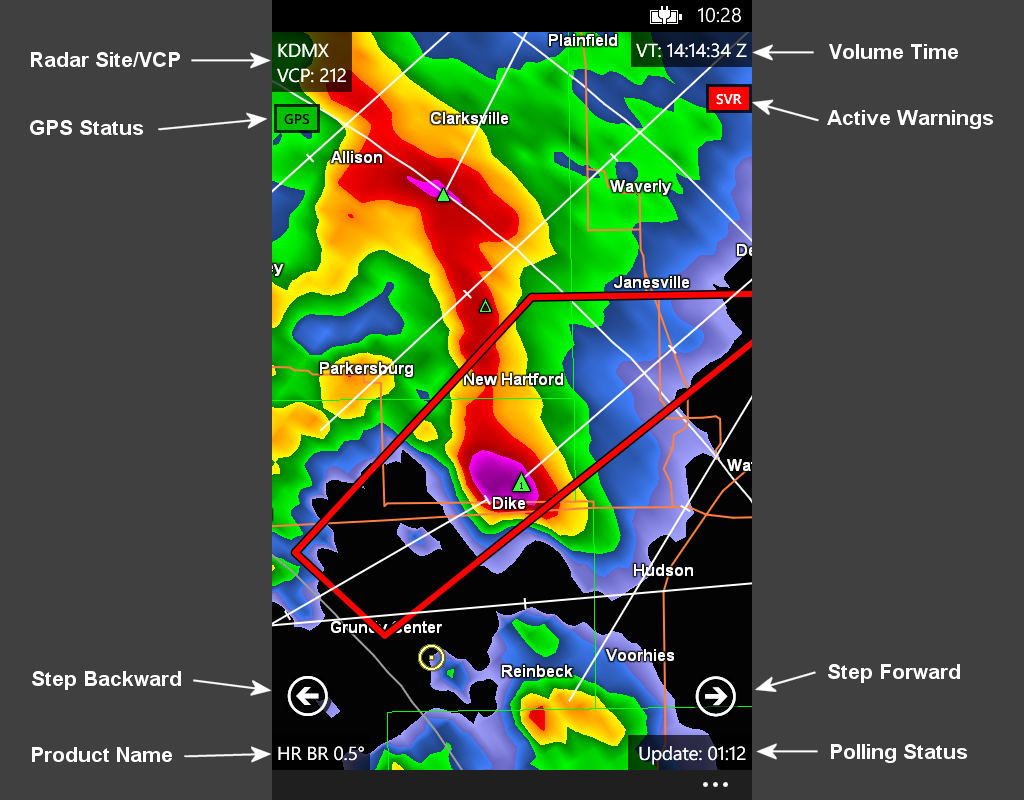
With the exception of the Update Time field in the lower-right, each of the four corners text respond to a double-tap "action" command.
There are several layers of text and graphics displayed in each panel: radar graphical data, county outlines, state outlines, roads, city labels, radar labels, LSR icons, warning outlines, storm tracks, hail icons, NMD/MESO icons, and finally TVS icons. By default, MRLevel3 displays BR 0.5° in a single panel.
If you tap on the ellipsis on the lower-right, MRLevel3's AppBar will be displayed:
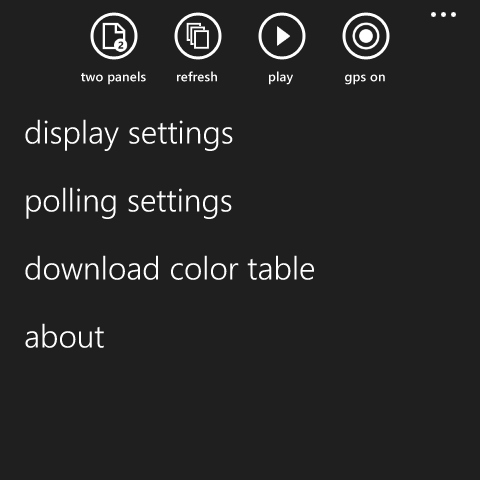
The AppBar has four buttons along with several menu items. The four buttons are:
Panel Count: Toggles between one and two panel mode
Refresh: Retrieves the latest 10 volume scans for the current radar site
Play/Stop: Starts or stops looping
GPS On/Off: Starts or Stops location tracking via GPS
The four menu items in the AppBar are:
Display Settings: shows Settings page, where you can toggle layer items, smoothing, etc.
Polling Settings: shows the Polling Settings page, where you can switch between the public NWS and AllisonHouse.com servers
Download Color Table: shows the SkyDrive Color Table page, where you download new color tables or switch back to default color tables
About: shows the standard About page with privacy and support information
Note that the AppBar is hidden when in Landscape orientation. This is to preserve as much space as possible for graphical radar data.
To pan the display, drag your finger across the screen. To zoom, pinch or stretch with two fingers on the screen.
The first time you run MRLevel3 on your Windows Phone the program will ask permission to use the Location Services to find the closest NEXRAD to your location. It will then ask permission to switch to that site. After that you can use the methods below to change sites.
There are two ways to change to a different radar site:
If you double-tap on the Radar Site/VCP field, the Select Radar page will be displayed:
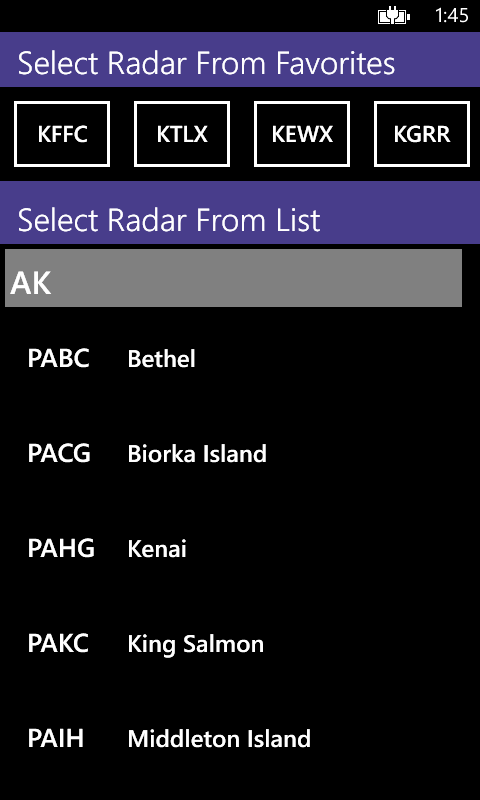
The Select Radar page has two sections: the Select Radar From Favorites section and the Select Radar From List section.
The Select Radar From Favorites section contains a list of four Favorite radars. Tap on a Favorite to switch to it. To change a saved Favorite site to the current site, press and hold it. Your phone will vibrate when the Favorite has been set.
The Select Radar From List section shows a list of all the NEXRAD and TDWR sites available. Tap on an entry to switch to it. To quickly find a site by state, tap on a State header to display the States list:
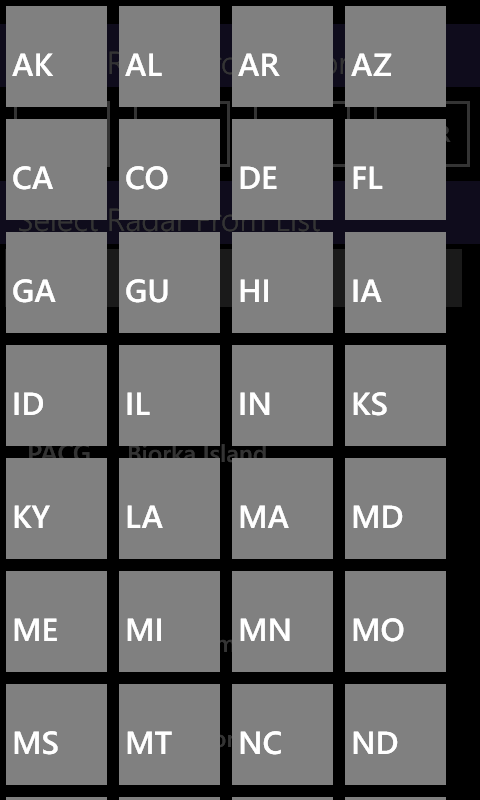
Tap on a particular state to zoom to it in the radar list then tap a site to switch to it.
BR 0.5° is the default radar data product. To select a different product, double-tap on the Product Name field in the panel of interest to display the Select Product page:
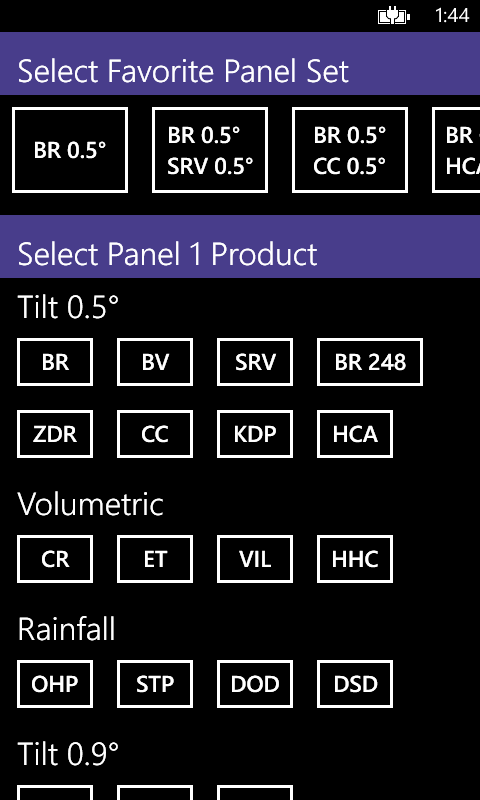
The Select Product page has two sections: the Select Favorite Panel Set section and the Select Panel N Product section. The value of "N" depends on which display panel you double-tapped in.
The Select Favorite Panel Set section contains a list of four saved panel configurations. You can swipe the list to the left or right. Tap a Favorite Panel Set to switch your radar display to that saved set. To save the current panel set to one of the four favorites, press and hold on it. Your phone will vibrate when the save has completed.
The Select Panel N Product section shows a list of all the supported Level III radar products. They're grouped by Tilt and Type, with the most commonly viewed products displayed first. This allows for quick switching between products. To select a product, tap on it.
See the GRLevel3 Radar Products page for more information on the radar products available in MRLevel3.
MRLevel3 can display up to two radar product panels at the same time. This feature is very important in analyzing Dual Pol data, where comparing two products is essential. You can change the number of panels by double-tapping on a Product Name in a panel and selecting a Favorite Panel Set or by tapping on the Panel Count button in the AppBar.
MRLevel3 downloads warnings for the entire nation. Only severe weather warnings are supported: Special Marine (SMW), Flash Flood (FFW), Severe Thunderstorm (SVR), and Tornado. Tornado warnings are broken down into three categories: regular (TOR), tornado-reported (TORR), and tornado emergency (TORE).
MRLevel3 shows the Active Warning Types in the upper-right of the radar display:
Double-tap on the Active Warnings Types to display the Active Warnings List page:

Double-tap on a warning in the list to automatically switch to the closest NEXRAD and zoom into the warning.
To see the text of a specific warning, double-tap on the warning outline in the radar display.
MRLevel3 downloads Local Storm Reports from the public NWS server. Icons representing the type and magnitude of an LSR are shown in the radar display. Double-tap on an LSR icon to see details of the report. Only LSRs issued within 60 minutes of the currently displayed product's volume scan time are shown.
MRLevel3 can use your phone's location service and sensors to enhance the radar display. There are three modes:
Storm Attributes are automatically downloaded and displayed on top of the radar data. There are Tornado Vortex Signature (TVS) icons, Elevated TVS icons (ETVS), New Mesocyclone Detection (NMD) icons, legacy Mesocyclone Detection (MESO) icons, and Hail Size icons.
|
|
TVS Icons The TVS iconsheet has two rows of ten icons. The icons represent the tens digit(s) of the TVS Low-Level Delta Velocity (LLDV) in knots. For example, the "19" icon indicates that LLDV was at least 190 kts.
|
|
|
ETVS Default Icon
|
|
|
NMD Icons The NMD iconsheet has two rows of five icons. The top row is shown when the mesocyclone does not extend down to the lowest velocity tilt. The NMD Strength Rank is used to select the column via the equation: (SR-1)/2.
|
|
|
Hail Icons The Hail iconsheet has five rows of four icons. Each row corresponds to the inches in the estimated hail size. Each column represents 0.25" increments. |
MRLevel3 integrates with your SkyDrive account to access custom color tables. You must set up your private SkyDrive folder in a specific way to enable this integration:
To use a custom color table, select "download color table" from the Application Bar menu. MR3 will ask you to login to your SkyDrive account and then display a list of the available subfolders. Select a subfolder to see the available color table files. Tap on a file to load it into MRLevel3. Press the Back Button to exit.
Color tables are simple text files that you can create. See the Color Table File Specification for more information.